


At one time, it seemed like Microsoft might never move past the Windows 10 operating system, but then it launched Windows 11 last year. Unfortunately, Microsoft couldn’t make everyone happy even with a more extended gap between new windows versions. Despite some noteworthy improvements in Windows 11, some nagging issues remain. Thankfully, many of them are fixable with a small degree of legwork—here’s how you can fix the major annoyances in Windows 11.
BYPASS THE TPM 2.0 CHECK
The first prominent Windows 11 annoyance begins before you even install it. Microsoft demands a TPM 2.0 module, among other hardware requirements, and not all machines have one. You can safely bypass this check if your PC is otherwise qualified to handle Windows 11. The fastest way to resolve this issue is to tweak the registry during the setup procedure.
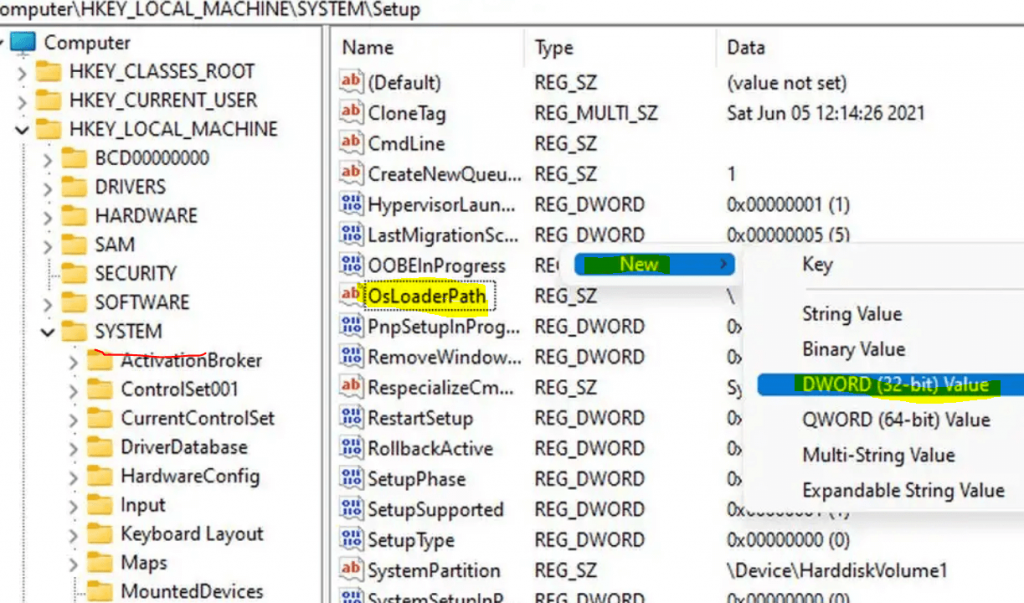
While in the Windows installation process, you can press Shift + F10 to open a command prompt. From there, you can access the Windows registry editor by typing “regedit” and hitting enter. Once opened, find HKEY_LOCAL_MACHINE\SYSTEM\Setup and then right-click. Select New > Key and name it LabConfig. Under that key, add two values using New > DWORD (32-bit value). One of them should be named BypassTPMCheck, and the other will be BypassSecureBootCheck. Next, double-click to modify the values, setting both of them to “1.” With that accomplished, you can return to the Windows setup and resume your installation process.
MOVE THE START BUTTON AND TASKBAR ICONS TO THE LEFT
Microsoft completely revamped the taskbar in Windows 11. One of the foremost things you’ll see about it is that the taskbar icons are no longer left-justified. Now, the icons are in the center, along with the legendary start button. If this transition tickles you the wrong way, Microsoft allows you to change it. However, the option is a bit difficult to find.

The setting you need to find is available under Settings > Personalization > Taskbar. Scroll down to the base, and expand the “Taskbar behaviors” section. Around the top of this list is the alignment choice. Switch it from “Center” to “Left,” and you’re all set to go. It’s also one of the many tweaks you can execute to make Windows 11 appear like Windows 10.
GET THE WINDOWS 10-STYLED CONTEXT MENU
One of the most annoying experiences in Windows 11 shouldn’t come as a surprise. There are two separate context menus now, corresponding to the two settings apps. When you right-click, Windows 11 shows you a simplified context menu that skips many options, just like the Windows 11 Settings app. If you want the complete layout, you have to click Show more options to bring the remainder of the context options. You can replace the context menu with limited options using some registry editing.
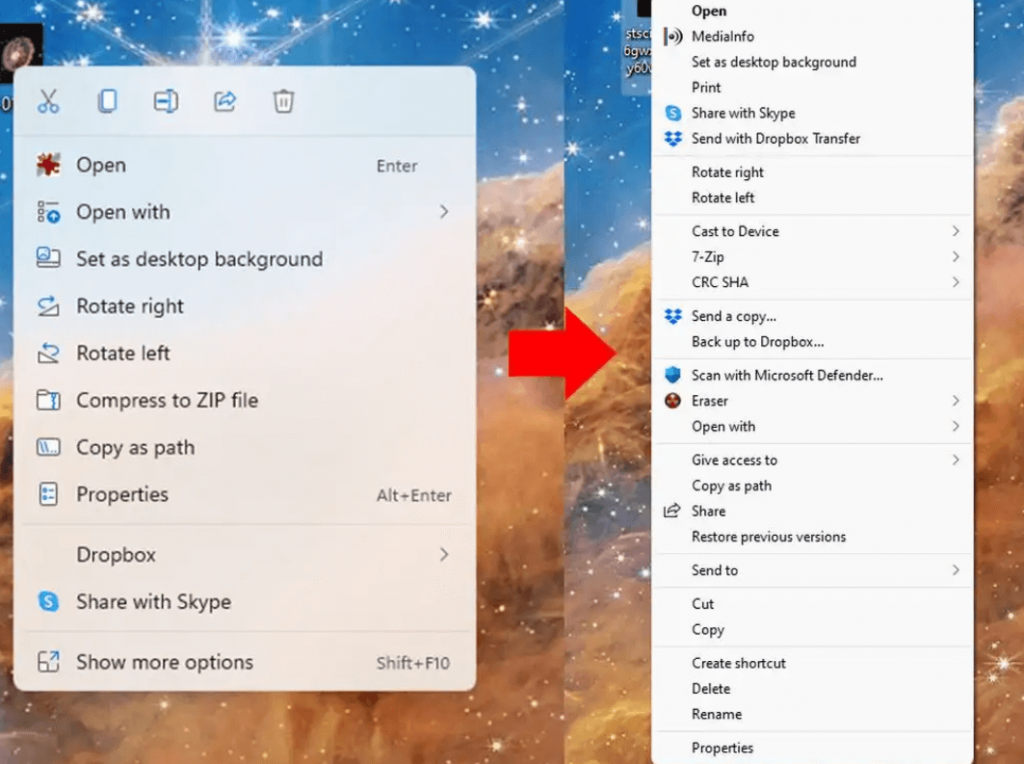
Search the start menu for “registry editor” or run “regedit” to get started. Once the registry editor opens, find Computer\HKEY_CURRENT_USER\SOFTWARE\CLASSES\CLSID and then right-click. Click New > Key option to create a new key folder. Name the key {86ca1aa0-34aa-4e8ba509- 50c905bae2a2} and then again right-click on it to add another subkey. Name this key InprocServer32. By default, this key holds a default with no value set. Double-click on it, leave the data value empty, hit Ok, and you’re done. Next time you restart your PC, you’ll have the classic context menu back.
SCHEDULED DARK MODE
It’s always lovely when the fix for a problem is an open-source program, and such is the case for Windows 11’s dark mode feature. We praise Microsoft for adding a dark mode in Windows 11. Still, it’s basically impractical without the capability to schedule it like every other platform with a dark theme. That’s why Auto Dark Mode is around.
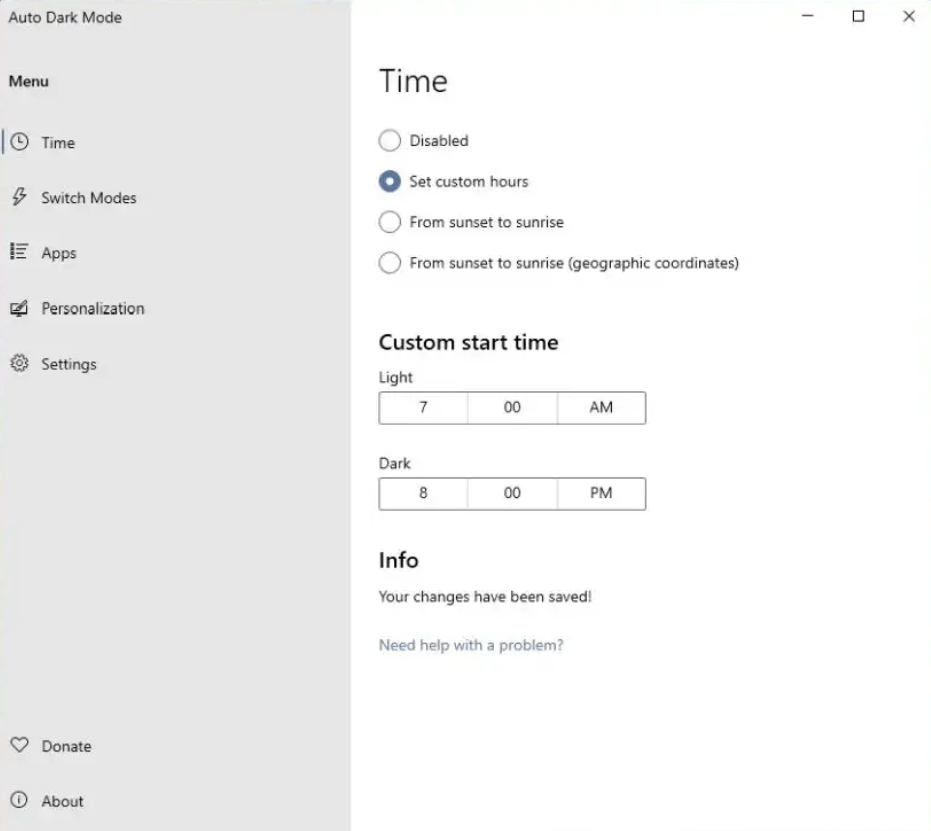
You can get this app for free from the GitHub page or the Microsoft Store. After installing, you can configure a schedule in the program. You can use custom hours for dark and light modes or automate the process based on your location. Auto Dark Mode also has options to control which regions of the interface change color, pause theme transformations while gaming, and more.
REVERT TO THE EXPLORER RIBBON
After using Windows 10 for so many years, many users got used to the ribbon interface in Windows 10 explorer, but it’s been scaled back laboriously in Windows 11. You’ll have to drill into the registry editor to get back the ribbon and all its jump menus. Again, run “regedit” or search the start menu for “registry editor.”
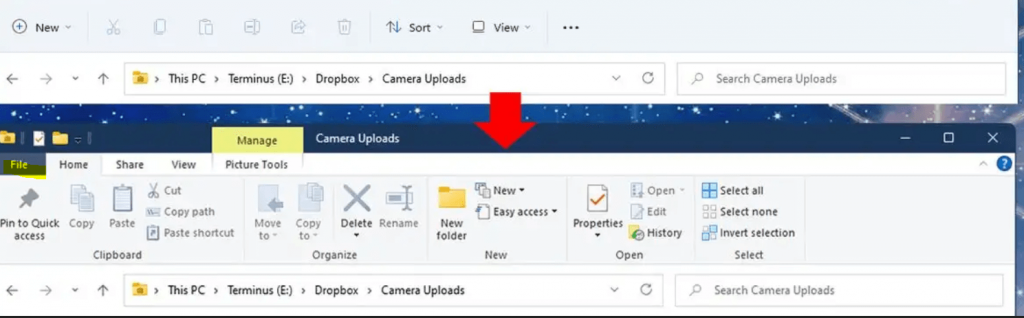
This time we’re navigating to HKEY_LOCAL_MACHINE\SOFTWARE\Microsoft\Windows\CurrentVersion\Shell Extensions. Under this, you should have two subkeys called Approved and Cached. Add a third one using the option New > Key and name it Blocked. Inside this new subkey, right-click and add a new String Value. Rename the string to {e2bf9676-5f8f-435c-97eb- 11607a5bedf7} and restart your computer. The ribbon should be around at the top of the Explorer window.
MAKE THE WIDGET BOARD RELEVANT
Microsoft is pledging to make Windows widgets something you’ll like to use. However, unless you are deeply ingrained in the Microsoft ecosystem, the content in this window won’t be relevant to you at all. So you might want to get rid of the widget pop-up so you aren’t irritated every time your cursor comes too close.
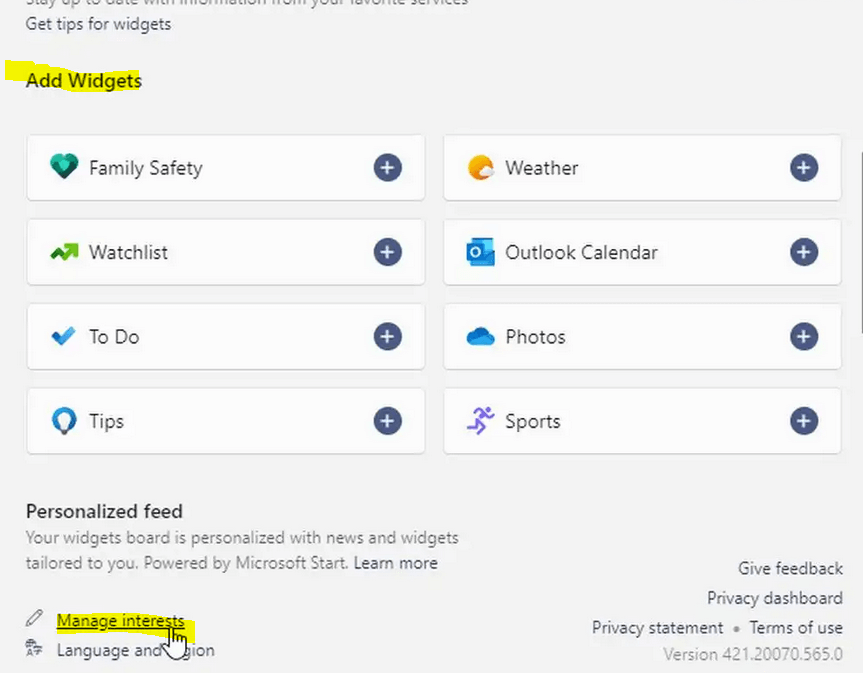
You can open the widget panel by hovering your cursor over the weather icon on the right side of the taskbar. You can use the three-dot menu button on widgets to dismiss them, and if you want to add additional widgets, click the + sign in the top right. This is also where you’ll discover a little, easily missed “Manage interests” link that can modify the news reports that appear in the widget board. It opens a web page in Edge that lets you pick your interest in different subjects. You can stop that from appearing if you’re explicitly not into something.
ADJUST TASKBAR LOCATION AND SIZE
When Microsoft reworked the taskbar for Windows 11, it dropped the choice to change the location and size. There would be good and bad news if you depended on taskbar adjustments for your workflow. The good one is that you can still adjust these parameters. The bad news is it needs more registry editing, and modifying the settings isn’t very convenient.
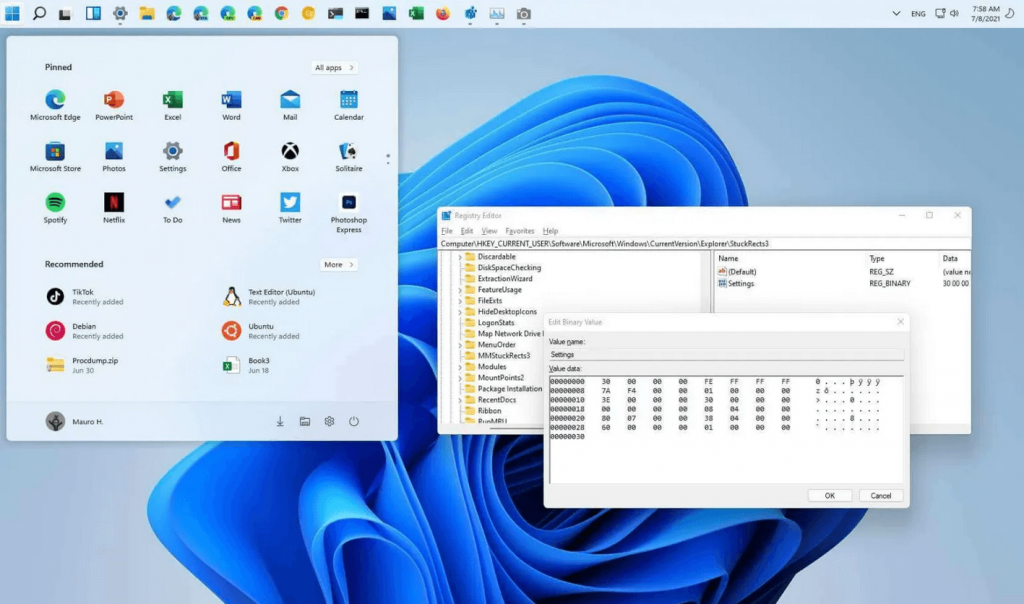
You’ll once again have to plunge into the Registry Editor. This time, you need to go to HKEY_CURRENT_USER\Software\Microsoft\Windows\ CurrentVersion\Explorer\StuckRects3. In this key, you’ll see a Settings binary file. Double-click on it, and locate the fifth value on the second line—it should be “03”. Altering this number to 01 and hitting Ok will move the taskbar to the top of the display after the restart. Substituting it with 00 will move it to the left, and 02 will put it to the right.
Unfortunately, you have to edit this key whenever you want to move the taskbar in Windows 11. Also, if you’re used to seeing the taskbar on the left, ready for disappointment. While you can push the bar to that side, current builds of Windows 11 don’t render it accurately—you may not be able to see your icons. However, moving to the top works just fine.
At this point, you might be glancing at a Windows 11 UI that’s much different than it was after the initial setup. Microsoft generally alerts against pushing changes like this, especially when it comes to dodging boot protections, but it’s your machine, and your workflow is more essential than Microsoft’s development preferences.


